


- Premiere Tutotial
How to Convert Horizontal Video to Vertical in Premiere/FilmoraPro

Mar 20,2019• Proven solutions
With the increased online video consumption over mobile devices and tablets, even social media platforms like Facebook, Instagram and Snapchat started extensively using vertical videos. For converting horizontal video to vertical, there are numerous video editing software applications in the market. With over 90% of mobile users on the internet accessing the latest videos online, it is prevalent to adapt to the most popular types of video formats.
Do you know how to make vertical video on premiere pro, or horizontal video to vertical? Check this article. As expressed by Facebook, 79% of new vertical video users expressed that vertical videos are more engaging. This surging trend of vertical videos has prompted film maker to create Premiere Pro vertical videos. If you are wondering how to convert horizontal video to vertical using Premier Pro, here in this article we have explained that clearly. We will also let you know how to convert horizontal video to vertical with FilmoraPro.
- Part 1: Why vertical video matters
- Part 2: How to convert horizontal video to vertical in FilmoraPro
- Part 3: How to make vertical video on Premiere Pro
Part 1: Why vertical video matters
1. Mobile first today
When the world is virtually living off the mobile, how can videos not be there in an appealing format! For using internet, the most used device nowadays is a mobile device. Having videos in vertical format is more convenient as you can also enjoy them in PIP (Picture In Picture) mode while carrying on with other work on your smartphone. The default aspect ratios of mobile devices are vertical, as they are primarily designed to take and make calls. So, having vertical videos is more convenient than horizontal ones over social media sites. Though, there is the option to watch videos vertically over smartphones, but a 94% of people watch videos vertically.
2. Vertical video is popular on social media
As you spend a huge amount of time on social media using your mobile device rather than a desktop or computer, it is obvious that you would be consuming videos in vertical alignment only. The usual way you hold your Smartphone is vertically, so as the video formats because it’s more intuitive that way.
Not only that, with time social networks realized the need and eliminated the black bars that used to be around vertical videos. This mobile friendly video format has now been optimized across social media platforms for a better experience.
3. Vertical video is powerful in data
Videos are driving data to a great extent and hence the user views on them is changing gradually, opening more ways for converting horizontal video to vertical and meet the market needs.
Here are some impressive data vouching for vertical video usage –
- Millenials no longer stay glued to their TV sets, rather consume videos on mobile devices twice as much than that of TV.
- 94% of the time people use their mobiles vertically according to a MOVR Mobile Overview report.
- On Snapchat, around 7 billion plus video clips are being watched by users and maximum time they are shot vertically.
- Referring to Mary Meeker’s Internet Trends report, vertical viewing of videos has increased multi-fold as compared to old times.
- On Snapchat, vertical videos Ads are watched 9 times more than horizontal video Ads.
Part 2: How to convert horizontal video to vertical in FilmoraPro
If you are looking for an easier way to convert horizontal video to vertical, here we recommend using FilmoraPro. For converting, you just need to change video's width and height. Below are the steps. Download it now to have a try (free)!


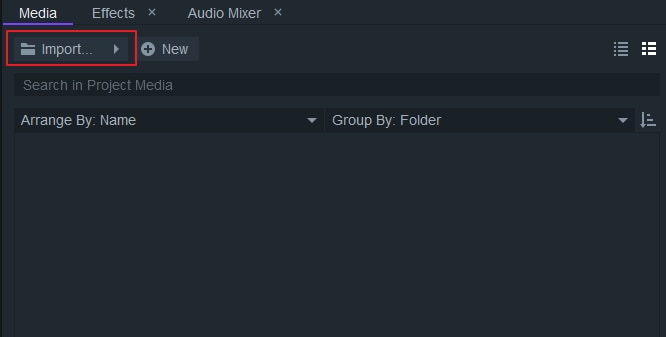
Step 1: Import video to FilmoraPro
Open up FilmoraPro. Click Import in the media library, or you can double click on the blank area in the media library to import video. Then drag the video onto timeline.
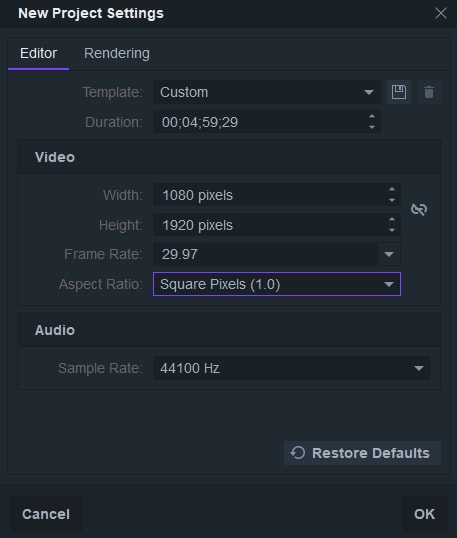
Step 2: Change width and height
Go to File > Project settings. A pop up window will appear. First click the link icon to turn off linking at video section. Then input "1080" for width and "1920" for height. Click OK. You can also click Restore Defaults if you want to keep the settings default in the future.
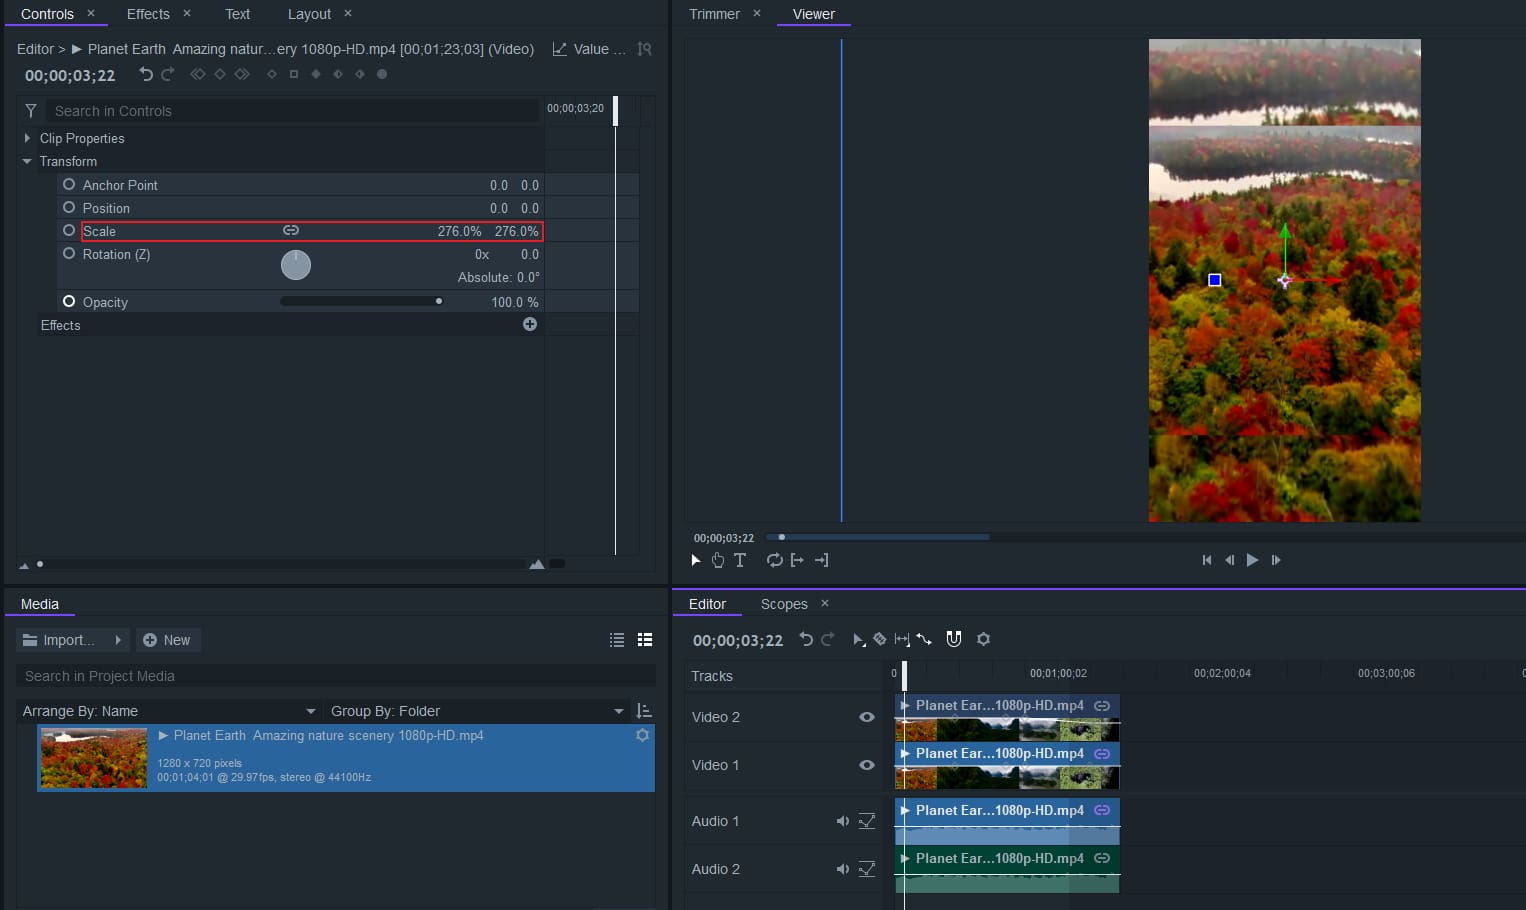
Step 3: Scale video (optional)
Preview your video. You will find horizontal video is converted to vertical! Click Controls panel to scale your video at transform section. Now, we will need to make another video clip in the timeline. Press Ctrl key and click video clip in your timeline to paste to another track. You will find another video and audio clip will appear in your timeline. Click the second video clip and scale it again until it can cover the black area in the preview window.
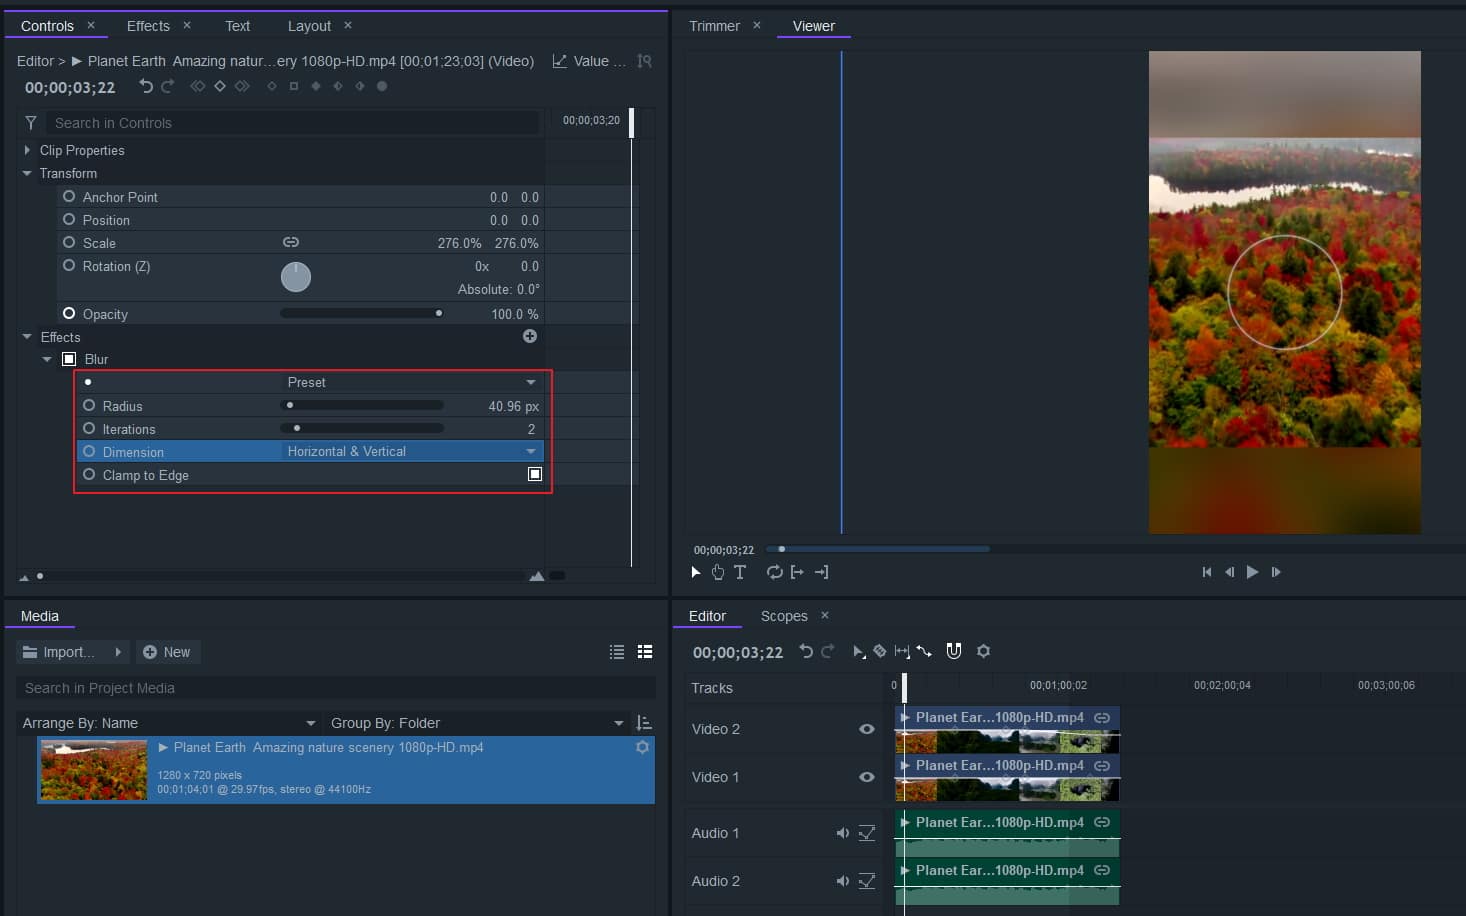
Step 4: Blur video (optional)
Go to Effects panel. Search "blur". You will find blur effect under Blurs tab. Drag it to the second video clip. Then you can adjust radius, preset and more to better the blur effect in contols panel.
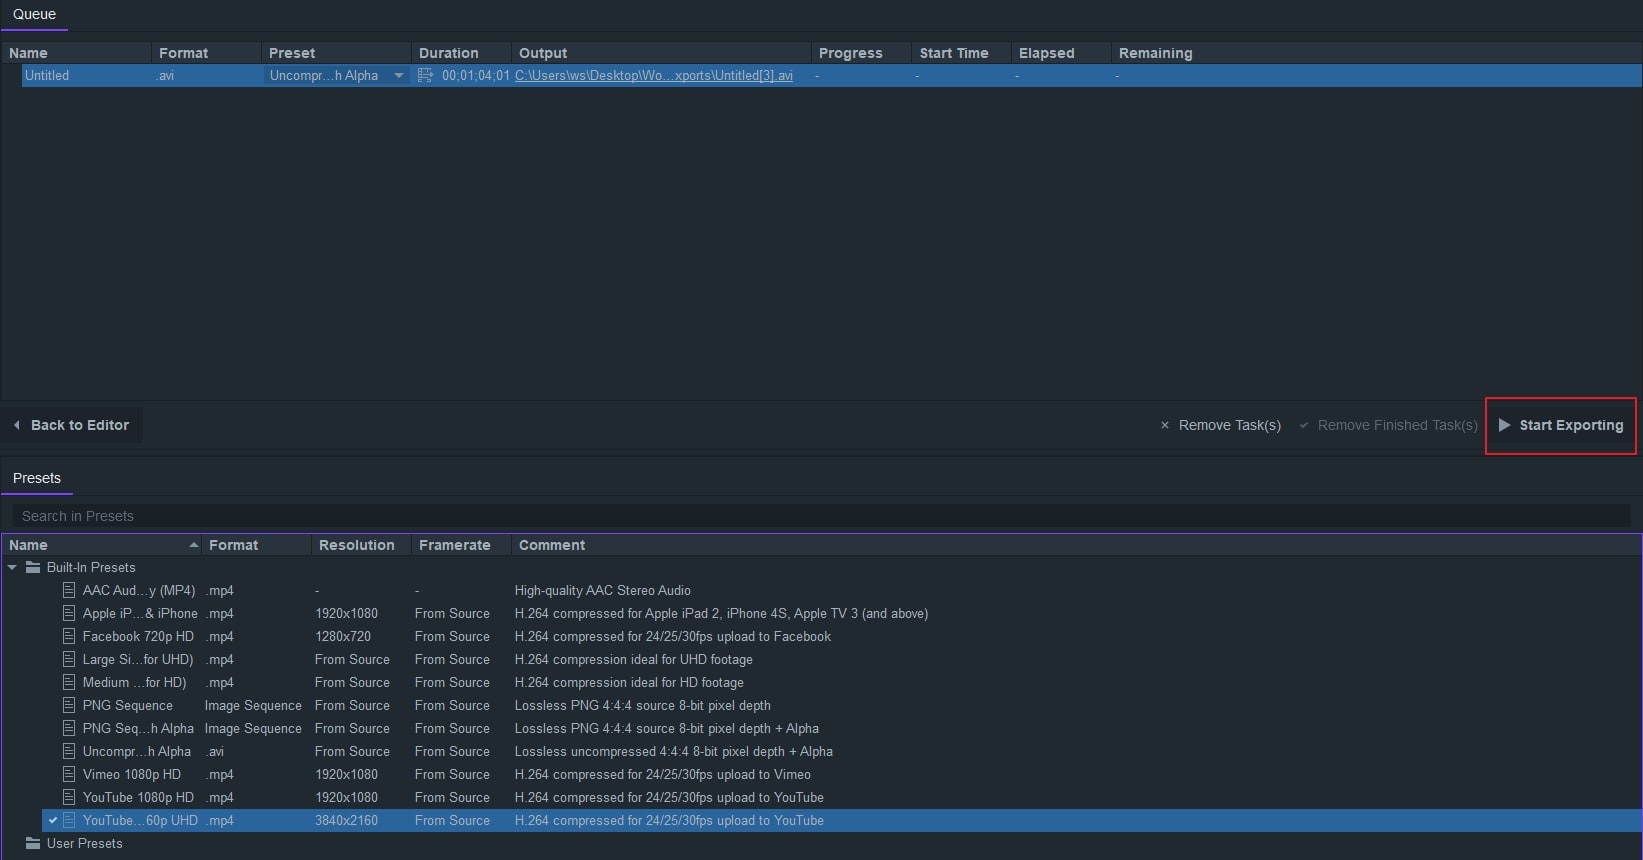
Step 5: Export video
Now, click Export. You can choose various format including mp4, avi for Facebook, YouTube and Vimeo. You can also edit its bitrate, aspect ratio and more by property. After everything is done, click Start Exporting... you will find the video is converted now. Download FilmoraPro to have a try!
Part 3: How to make vertical video on Premiere Pro
After understanding the need for Premiere Pro vertical videos and their significance, now is the time to learn how to convert Premiere Pro vertical video from horizontal one.
Let’s explore the wonders of Premiere Pro vertical video –
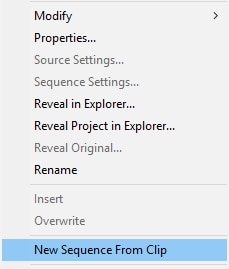
Step 1: Create a Sequence after importing your Clip
After launching Adobe Premier Pro on your system, you need to open a new project and import the desired clip. Go to the ‘Project’ panel and then right-click the desired clip. Select ‘New Sequence from Clip’.
Step 2: Edit Settings for Sequence
Under ‘Project Panel’ you need to right-click the sequence and select ‘Sequence Settings’. Now, choose ‘Custom’ to specify the ‘Editing Mode’ and assign the ‘Frame Size’ to 9:16 . If you want to choose pixel aspect ratio, then go for ‘Square Pixels’.

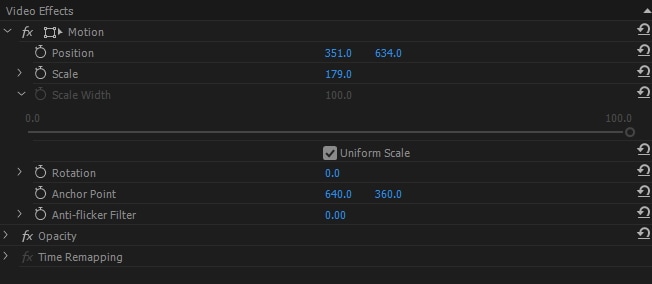
Step 3: Crop after Resizing
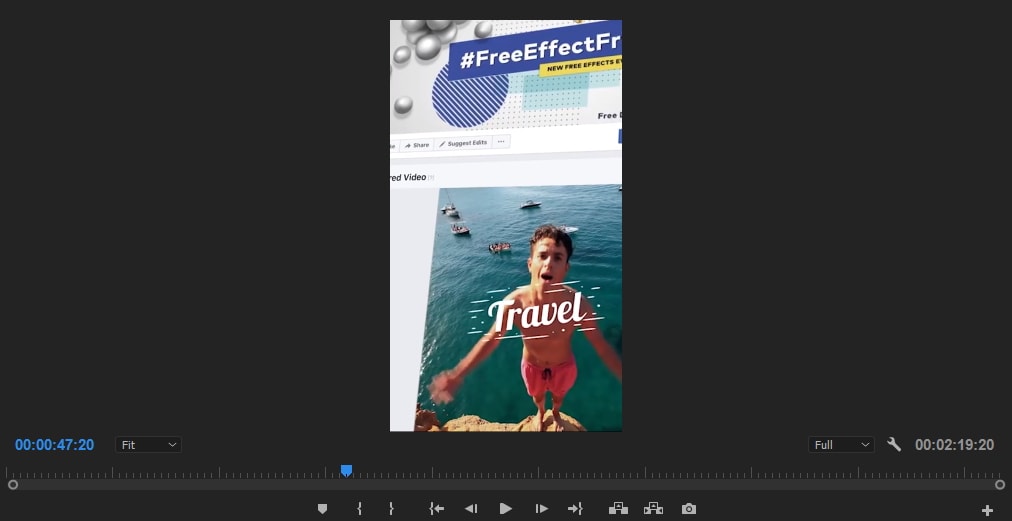
Go to ‘Window’ > ‘Effect Control’ and choose a desired clip. For cropping the video, you need to go to the ‘Motion’ tab and mention the ‘Scale’ and ‘Position’ tools. To make sure that you have selected the right framing throughout the video, watch it after you have cropped it.
When you are working with Premier, you get the chance to cut the video to a desired length for a specific channel or have multiple clips with music.
Step 4: Exporting the edited clip
You need to go to ‘File’ > ‘Export’ > ‘Media’ and then select H.264 ‘Format’. Under the ‘Preset’ option, you need to pick ‘Match Source – High bitrate’. Now, you have to tap the ‘Output Name’ and specify a file name and location. Google Drive or Dropbox might be a quick option here.
Nutshell
Coming towards the end, we conclude that Premiere Pro vertical video creating is quick and easy compared to other tools available in the market. Though, the 9:16 aspect ratio is perfect for Facebook, Snapchat, YouTube, and Instagram Stories, Instagram Feeds hardly support it. You can do some more cropping and enjoy the benefits of vertical videos.
Bring up your video to a professional level with straightforward tools.
Try It Free Try It Free
Liza Brown
chief Editor
0 Comment(s)